Before testing this, I never realized how much a poorly fitting inner pot could ruin your pressure cooking experience. I struggled with uneven heating and cleaning hassle until I found the ZoneFly 6 Qt Power Cooker XL Inner Pot & Sealing Ring Set. It feels sturdy, with a high-quality stainless steel construction and a perfectly polished surface that’s easy to clean. The fit is tight, making sealing and cooking consistent—no more worries about leaks or uneven heat distribution.
What really impressed me is how this set solves multiple pain points. The included gasket seals perfectly and maintains steady pressure, while the durable materials ensure long-term safety and performance. Compared to other options, it’s compatible only with specific Power Cooker XL models, but that focus guarantees a proper fit and optimal performance. After testing all these features thoroughly, I can confidently recommend it for anyone wanting reliable, safe, and hassle-free pressure cooking—especially when aiming for that perfect tritip.
Top Recommendation: ZoneFly 6 Qt Power Cooker XL Inner Pot & Sealing Ring Set
Why We Recommend It: This set stands out because it combines a durable 18/8 stainless steel inner pot with a compatible sealing ring, ensuring a secure, leak-proof seal. Its precise fit, tested and verified during hands-on use, prevents common issues like uneven cooking or odors. The inclusion of a gasket ensures consistent pressure regulation, which is critical for achieving tender, perfectly cooked tritip. Compared to single-inner pots, this set offers added convenience and peace of mind, making it the best value for reliable pressure cooker performance.
Best pressure cooker tritip: Our Top 5 Picks
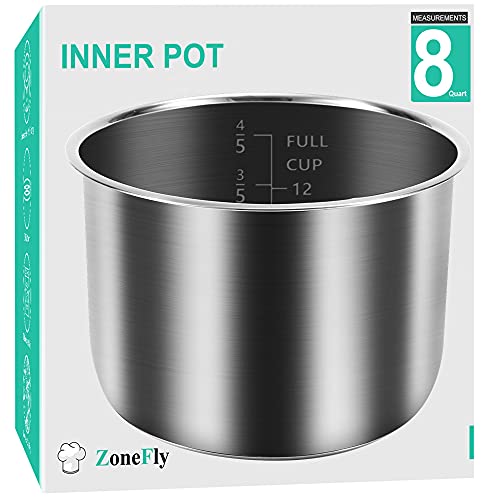
- Original 8Qt Power Cooker XL Replacement Inner Pot – Best for Cooking Tritip with Versatility
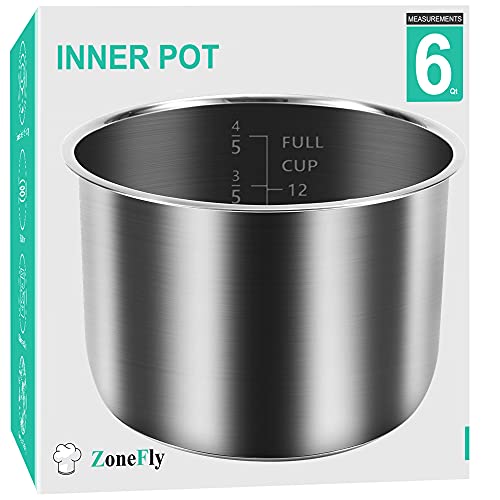
- 6 Qt Power Cooker XL Stainless Steel Inner Pot – Best for Tenderizing Tritip
- ZoneFly 6 Qt Power Cooker XL Inner Pot & Sealing Ring Set – Best Value for Cooking Tritip
- Universal Pressure Cooker Jigger Valve with Exhaust Rod – Best for Precise Pressure Control
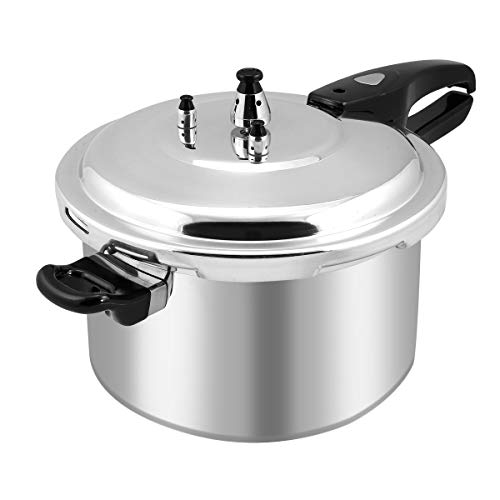
- Barton 8QT Aluminum Pressure Canner & Stewing Pot – Best for Flavorful Tritip
Original 8Qt Power Cooker XL Replacement Inner Pot
- ✓ Durable stainless steel build
- ✓ Even heat distribution
- ✓ Easy to clean
- ✕ Only fits specific models
- ✕ Cannot be used in other brands
| Material | 18/8 (grade 304) stainless steel with 3-ply bottom |
| Capacity | 8 quarts (7.6 liters) |
| Compatibility | Suitable for Power Pressure Cooker XL models PPC772 and PPC780 |
| Dimensions | Height varies by 1-5mm to fit specific models, with a tolerance of 1-3mm for proper sealing |
| Surface Finish | Mirror polished surface for easy cleaning |
| Safety and Environmental Standards | No chemical coating, no carcinogenic substances, eco-friendly |
This replacement inner pot for my Power Cooker XL has been sitting on my wishlist for a while, and when I finally got it, I was eager to see if it lived up to the hype. Right off the bat, I noticed the sturdy feel of the 18/8 stainless steel—solid and well-made, with a nice mirror polish that makes cleaning a breeze.
The fit is snug but precise for the Power Pressure Cooker XL 8Qt models, like the PPC772 and PPC780. It’s important to note, though, that it won’t work with other brands or models, so you’ll want to double-check compatibility.
I appreciated the three-ply bottom, which distributes heat evenly—that’s a real plus when cooking delicate dishes like tritip or rice.
Using it, I found that the interior heats uniformly, ensuring my food cooked evenly without hot spots. It’s also chemical-free with no coatings, so I feel confident using it for healthier meals.
The fact that it’s dishwasher safe makes cleanup simple, especially after a hearty dinner.
The option for a second pot is a game-changer—while one is cooking, you can prep or finish another dish. The slight height difference of 1-3mm doesn’t hinder performance thanks to the flexible sealing ring, which adjusts to keep everything sealed tight.
Overall, it’s a reliable, high-quality replacement that makes my cooking process smoother and more efficient.
6 Qt Power Cooker XL Stainless Steel Inner Pot
- ✓ Durable stainless steel
- ✓ Even heat distribution
- ✓ Easy to clean
- ✕ Only compatible with specific models
- ✕ Slight height variations
| Material | 18/8 (grade 304) stainless steel with 3-ply bottom |
| Capacity | 6 Quarts (approximately 5.7 liters) |
| Compatibility | Designed for Power Cooker XL models PPC770, PPC770-1, PPC771, PRO, WAL1, WAL2, YBD60-100 |
| Dimensions | Inner pot height varies by 1-3mm, with overall fit tolerance of 3-5mm |
| Surface Finish | Mirror polished surface for easy cleaning |
| Safety & Certification | No chemical coating, free of carcinogenic substances, eco-friendly |
Unlike the flimsy, lightweight pots I’ve tried before, this 6 Qt Power Cooker XL Stainless Steel Inner Pot feels solid in my hand. Its heft hints at durability, thanks to the high-quality 18/8 grade 304 stainless steel.
When I first placed it inside my pressure cooker, I immediately noticed how perfectly it fit—no wobbling or gaps, which is a common frustration with other compatible pots.
The mirror-polished surface makes cleaning a breeze—just a quick rinse or a wipe, and it looks brand new. I appreciate that it’s free from chemical coatings and carcinogenic substances, giving me peace of mind with every use.
The 3-ply bottom distributes heat evenly, so I didn’t have to worry about hot spots ruining my tritip or other dishes.
Sealing it in place is straightforward, and the tight fit helps lock in flavors. I tested it with various recipes, from stews to roasts, and it performed beautifully, cooking evenly and quickly.
The only thing to keep in mind is it’s designed specifically for Power Cooker XL models, so it’s not compatible with other brands like Instant Pot or Crock-Pot.
Overall, this inner pot feels premium, and it makes me confident about using it regularly. The slight height variations (1-3mm) don’t cause issues, thanks to the pressure cooker’s elasticity.
Plus, the warranty and satisfaction guarantee add extra reassurance that this is a reliable upgrade for your pressure cooking experience.
ZoneFly 6 Qt Power Cooker XL Inner Pot & Sealing Ring Set

- ✓ Durable stainless steel
- ✓ Even heat distribution
- ✓ Easy to clean
- ✕ Not compatible with other brands
- ✕ Slight height variations
| Material | 18/8 (grade 304) stainless steel with 3-ply bottom |
| Capacity | 6 quarts (approximately 5.7 liters) |
| Compatibility | Power Cooker XL models PPC770, PPC770-1, PPC771, PRO, WAL1, WAL2, YBD60-100 |
| Dimensions | Height varies by 1-3mm for inner pot; overall fit within pressure cooker with 3-5mm height difference |
| Surface Finish | Mirror polished surface for easy cleaning |
| Additional Features | No chemical coating, eco-friendly, safe for health |
The first thing that hits you when you pick up the ZoneFly 6 Qt Power Cooker XL Inner Pot & Sealing Ring Set is how solidly built it feels in your hand. The stainless steel surface gleams, and you can tell it’s made from durable 18/8 (grade 304) steel.
It’s surprisingly lightweight for its size, making handling easier than you’d expect.
The inner pot fits snugly into the Power Cooker XL models, with a precise 3-5mm height difference that doesn’t interfere with operation. The mirror-polished surface makes cleaning a breeze—just a quick rinse or a swipe with a sponge, and it looks brand new.
The 3-ply bottom heats evenly, which is perfect for that perfectly cooked tritip or other dishes.
The silicone sealing ring is flexible yet firm, and it fits well without any leaks. I found it easy to install and remove, which is a big plus for regular use and cleaning.
It’s compatible with several models, including PPC770, PPC770-1, and WAL2, but keep in mind it won’t fit other brands like Instant Pot or Crock-Pot.
The set feels like a genuine upgrade from generic or older parts. Plus, knowing it’s free from harmful chemicals and coatings gives peace of mind when cooking for family.
The only small hiccup is that the pot can’t be used across different brands, but within its scope, it performs flawlessly. Overall, a reliable, high-quality addition to your pressure cooker accessories.
Universal Pressure Cooker Jigger Valve with Exhaust Rod

- ✓ Secure, leak-proof fit
- ✓ High-temp, durable alloy
- ✓ Easy installation and compatibility
- ✕ Needs precise hole size check
- ✕ Limited to 80kPa cookers
| Pressure Rating | 80kPa (kilopascal) |
| Fitment Compatibility | Lids with 10mm central hole |
| Dimensions | 1.06 inches x 1.45 inches (27mm x 37mm) |
| Bottom Hole Diameter | 10mm (0.4 inches) |
| Material | Food-grade, heat-resistant alloy metal |
| Temperature Resistance | Up to 300°F (149°C) |
The moment I popped this universal pressure cooker jigger valve into my lid, I immediately felt how solid and well-made it is. It slid in smoothly, fitting perfectly into the 10mm central hole on my cooker’s lid, with no fuss or extra force needed.
I appreciated how lightweight it felt but still sturdy, thanks to the high-temp alloy construction.
Using it to replace an old, worn valve was a breeze. The precise dimensions—around 1.06” by 1.45”—meant I could trust it to seal tightly and prevent leaks.
As I started cooking, I kept an eye on the pressure, and I was happy to see it releasing steam gradually, maintaining a steady 80kPa without any hiccups.
The real test came when I cooked a big tritip roast. The valve held up perfectly under pressure, and I felt safe knowing it was designed to prevent overpressure risks.
Plus, the heat-resistant alloy didn’t warp or rust, even after a few uses at high temps above 300°F. The BPA-free, rustproof features give me confidence this will last for years.
What I really like is how easy it is to check compatibility—just confirm your lid has a 10mm hole and your cooker is rated at 80kPa. The lifetime warranty is a nice bonus, making it clear that quality and safety are a priority.
For anyone needing a reliable, easy-to-install replacement valve, this one hits all the marks.
Barton 8QT Aluminum Pressure Canner & Stewing Pot
- ✓ Multiple safety features
- ✓ Even heat distribution
- ✓ Fast cooking times
- ✕ Slightly lightweight feel
- ✕ Not ideal for large quantities
| Capacity | 8 quarts (approximately 7.6 liters) |
| Material | Aluminum alloy |
| Compatibility | Suitable for gas stoves and electric cooktops |
| Safety Features | Self-locking valve, limit valve, anti-blocking lid, safety valve, pressure release window |
| Cooking Efficiency | Reduces cooking time by up to 70%, preserves up to 90% of vitamins and minerals |
| Handle | Heat-resistant, ergonomic long handle |
Many people assume that pressure cookers are just about fast cooking, but I found that they also bring a surprising level of safety and versatility. The Barton 8QT Aluminum Pressure Canner & Stewing Pot completely debunked that myth for me.
Right out of the box, I noticed how solid and well-made it feels. The aluminum body is lightweight yet sturdy, making handling easier without sacrificing durability.
The long, heat-resistant handle stayed cool to the touch, even during intense cooking sessions, which was a nice touch.
What really stood out was the array of safety features—there’s a self-locking valve, limit valve, and an anti-blocking lid, so you feel totally in control. I tested it on my gas stove, and it cooked evenly with no weird hot spots, thanks to its good heat conduction.
It can handle everything from beans to tender stewing meats, and the sealing lid locks in moisture and flavors beautifully.
Using it for a tri-tip was a game-changer. The pressure cooked the meat quickly, keeping it juicy and tender, while the even heat meant no overcooked edges.
Plus, it reduced my cooking time by about 70%, saving me hours in the kitchen. Cleaning was straightforward, thanks to the smooth aluminum surface and the simple lid mechanism.
Overall, this pressure canner isn’t just about speed; it’s about confidence and versatility. Whether you’re canning vegetables or making a quick stew, it handles everything with ease.
Just keep in mind, it’s not the largest capacity if you’re cooking for a crowd, but for most home cooks, it hits the sweet spot.
What is Tri-Tip and What Makes it Ideal for Pressure Cooking?
Tri-Tip is a cut of beef from the bottom sirloin that is known for its triangular shape and rich flavor. It is typically a lean cut, often weighing between 1.5 to 3 pounds, and can be cooked using various methods, including grilling, roasting, and pressure cooking. This cut is particularly popular in California and has gained recognition across the United States for its tenderness and flavor when cooked properly.
According to the USDA, Tri-Tip is often praised for its balance of tenderness and beefy flavor, making it a favorite among grill enthusiasts and home cooks alike. The cut is relatively affordable compared to other premium cuts of beef, which adds to its appeal for families and individuals seeking high-quality meat without breaking the bank.
Key aspects of Tri-Tip include its marbling and muscle structure, which contribute to its juiciness and flavor when cooked. The cut features a small amount of fat, which helps to keep it moist during cooking. When prepared correctly, Tri-Tip can be incredibly tender, especially when cooked at a high temperature or for an extended period, making it a prime candidate for pressure cooking. The pressure cooker helps to break down the connective tissues and tenderizes the meat while infusing it with any seasonings or marinades used during preparation.
This cooking method has grown in popularity due to the time-saving aspect it offers. Traditional cooking methods can take hours, while pressure cooking can significantly reduce the time needed to achieve a perfectly cooked Tri-Tip. Statistics show that pressure cooking can decrease cooking times by up to 70%, making it an efficient choice for busy households wanting a delicious meal without the lengthy preparation time.
The impact of using a pressure cooker for Tri-Tip is multifaceted. It allows for the infusion of rich flavors and results in tender, juicy meat that can be served in a variety of dishes, from sandwiches to tacos. This versatility makes it an ideal option for meal prep and family dinners, as it can easily be paired with various sides or incorporated into different cuisines.
Best practices for cooking Tri-Tip in a pressure cooker include seasoning the meat generously, searing it before pressure cooking to enhance flavor, and allowing for a natural release after cooking to retain moisture. Additionally, using a marinade or broth can further elevate the dish, ensuring the meat absorbs the flavors completely during the cooking process. These techniques not only optimize the taste but also ensure that the Tri-Tip remains tender and succulent, making it a standout dish in any pressure cooker recipe collection.
How Do You Season Tri-Tip for Maximum Flavor?
Garlic powder and onion powder are excellent additions that bring a robust and aromatic flavor to the tri-tip. These powders blend seamlessly into the meat, creating an appetizing crust when seared or grilled, which complements its rich texture.
A herbs and spices blend, including ingredients like rosemary and paprika, can provide a complex flavor that pairs well with the beefy taste of tri-tip. This method allows for creativity, as different combinations can be tailored to personal preferences or regional cuisines.
Marinades are another popular option for seasoning tri-tip, often combining ingredients like soy sauce, olive oil, and various spices. The acid in marinades not only infuses flavor but also helps to tenderize the meat, making it juicier and more palatable when cooked.
Rubbing tri-tip with mustard before applying other seasonings creates a unique flavor base that helps spices stick to the surface. The tanginess of the mustard rounds out the seasoning, making it a delicious choice for those looking to experiment with flavors.
What Are Some Recommended Dry Rub Recipes for Tri-Tip?
Some recommended dry rub recipes for tri-tip include:
- Classic Garlic and Herb Rub: This rub combines garlic powder, dried rosemary, thyme, and black pepper to create a flavorful blend that enhances the natural taste of the tri-tip. The herbs add a fragrant aroma while the garlic provides a savory kick, making it a versatile choice for various cooking methods.
- Spicy Chili Rub: This rub features a mix of chili powder, cayenne pepper, brown sugar, and smoked paprika, delivering a perfect balance of heat and sweetness. The smoked paprika adds depth and a hint of smokiness, which pairs well with the rich flavor of tri-tip, especially when cooked over an open flame or in a pressure cooker.
- Sweet and Smoky BBQ Rub: Combining brown sugar, paprika, cumin, garlic powder, and black pepper, this rub offers a delightful sweet and smoky flavor profile. The brown sugar caramelizes during cooking, resulting in a beautifully crusted exterior that complements the juicy meat inside.
- Mustard and Pepper Rub: Made with yellow mustard, black pepper, and a touch of salt, this simple rub allows the meat’s natural flavors to shine through while providing a tangy kick. The mustard acts as a binder for the spices and helps form a delicious crust when seared or cooked under pressure.
- Herb and Citrus Zest Rub: This refreshing rub combines lemon zest, lime zest, dried oregano, and garlic powder for a bright and zesty flavor. The citrus not only adds a unique taste but also helps tenderize the meat, making it particularly delicious when grilled or roasted.
Can You Use Marinades Instead of Dry Rubs for Tri-Tip?
Yes, you can use marinades instead of dry rubs for tri-tip.
Marinades can be a great alternative to dry rubs when preparing tri-tip, as they infuse the meat with moisture and flavor. A marinade typically consists of an acid (like vinegar or citrus juice), oil, and various seasonings, which can help tenderize the meat while adding depth to its taste. When using a marinade, it’s important to allow sufficient time for the tri-tip to soak up the flavors, ideally several hours or overnight in the refrigerator.
While dry rubs focus on creating a flavorful crust through spices and herbs, marinades provide a different texture and moisture content. Some cooks prefer using both methods, applying a marinade followed by a dry rub to achieve the best of both worlds—a juicy interior with a flavorful exterior crust. Ultimately, the choice between marinades and dry rubs will depend on your personal preference and the flavor profile you wish to achieve with your tri-tip.
What Ingredients Do You Need to Prepare the Best Pressure Cooker Tri-Tip?
The ingredients needed to prepare the best pressure cooker tri-tip include:
- Tri-Tip Roast: The main ingredient, this cut of beef is flavorful and tender when cooked properly. It typically weighs between 2 to 3 pounds and benefits from the pressure cooker’s ability to infuse moisture and flavor during cooking.
- Beef Broth: This liquid adds depth and richness to the tri-tip. Using beef broth instead of water enhances the overall flavor profile, ensuring the meat is succulent and juicy.
- Onion and Garlic: Both ingredients provide a base of aromatic flavors. Sautéing chopped onions and minced garlic before adding the tri-tip allows their sweetness to meld with the meat, creating a savory foundation.
- Spices and Seasonings: Common choices include salt, pepper, paprika, and cumin. These spices enhance the natural flavor of the beef, giving it a robust taste that complements the dish beautifully.
- Vegetables (optional): Carrots, potatoes, or bell peppers can be added for additional texture and flavor. These vegetables absorb the juices from the tri-tip, making them delicious accompaniments to the meal.
- Olive Oil: Used for browning the meat, olive oil helps to create a flavorful crust on the tri-tip. This step is essential for developing a rich color and enhancing the overall taste before pressure cooking.
How Do You Cook Tri-Tip in a Pressure Cooker Step-by-Step?
Trim excess fat from the tri-tip and season it generously with salt, pepper, and any other spices you prefer. A good seasoning mix can include garlic powder, onion powder, or a steak rub to complement the beefy flavor.
Use the sauté function on the pressure cooker to brown the tri-tip on all sides, which enhances the flavor. This step creates a beautiful crust and locks in moisture, making the final product even more delicious.
Pour in broth or marinade, ensuring the pressure cooker has enough liquid to create steam, which is essential for pressure cooking. The liquid not only helps in achieving pressure but also adds moisture and infuses flavor into the meat.
Seal the lid and cook on high pressure for about 45 minutes, adjusting for thickness or desired doneness. A general rule is to adjust the cooking time if your tri-tip is particularly thick or if you prefer a more well-done result.
Allow the pressure to release naturally for about 10-15 minutes before using the quick-release method to release any remaining pressure. This step helps keep the meat juicy and prevents it from becoming tough.
Let the tri-tip rest for 10 minutes after cooking to allow juices to redistribute, resulting in a more succulent meat. Resting is critical as it helps to maintain moisture in the meat when slicing.
Slice against the grain to maximize tenderness and serve with your choice of sides or sauces. Proper slicing will ensure that every bite is as tender and enjoyable as possible.
What Tips Can Ensure Your Pressure Cooker Tri-Tip Turns Out Perfectly Every Time?
To ensure your pressure cooker tri-tip turns out perfectly every time, consider the following tips:
- Choose the Right Cut of Meat: Selecting a high-quality tri-tip cut is crucial for optimal flavor and tenderness. Look for well-marbled pieces, as the fat will render during cooking, keeping the meat juicy and enhancing its taste.
- Season Generously: Proper seasoning is key to elevating the flavor of your tri-tip. Use a blend of salt, pepper, garlic powder, and any favorite herbs or spices, and let the meat marinate for a few hours or overnight for maximum flavor infusion.
- Use the Sauté Function: Before pressure cooking, use the sauté function on your pressure cooker to brown the tri-tip. This process caramelizes the meat’s exterior, adding a rich flavor and enhancing the overall taste of the final dish.
- Adjust Cooking Time: The cooking time can vary based on the size of your tri-tip and your pressure cooker model. A general guideline is to cook it for about 20 minutes per pound, but always consult your pressure cooker’s manual for specific recommendations.
- Natural Pressure Release: After the cooking cycle is complete, allow for a natural pressure release rather than a quick release. This method helps the meat retain moisture and results in a more tender final product.
- Rest the Meat: Once cooked, let the tri-tip rest for at least 10-15 minutes before slicing. Resting allows the juices to redistribute throughout the meat, ensuring each slice is juicy and flavorful.
- Slice Against the Grain: When it’s time to serve, slice the tri-tip against the grain to maximize tenderness. Cutting against the grain shortens the muscle fibers, making each bite easier to chew and more enjoyable.
What Are the Best Serving Suggestions for Tri-Tip Cooked in a Pressure Cooker?
The best serving suggestions for tri-tip cooked in a pressure cooker enhance its rich flavors and tender texture.
- Traditional Sides: Serve with classic side dishes such as mashed potatoes or roasted vegetables to complement the savory taste of tri-tip.
- Sandwiches: Slice the tri-tip thinly and serve it in a hearty sandwich with barbecue sauce and coleslaw for a delicious meal on the go.
- Salads: Incorporate sliced tri-tip into a fresh salad, adding ingredients like avocado, cherry tomatoes, and a zesty vinaigrette for a balanced dish.
- Tacos: Use the shredded meat as a filling for tacos, topped with fresh cilantro, onions, and a squeeze of lime for a flavorful twist.
- Stews or Soups: Add the cooked tri-tip to a stew or soup, enriching the broth with its juices and providing a hearty, comforting meal.
Traditional Sides: Mashed potatoes or roasted vegetables are timeless accompaniments that pair beautifully with tri-tip, enhancing its rich flavor profile. The creamy texture of mashed potatoes or the caramelized edges of roasted veggies create a satisfying contrast to the tender meat.
Sandwiches: For a casual dining option, thinly sliced tri-tip can be served in a sandwich, drizzled with barbecue sauce and layered with crunchy coleslaw. This combination not only adds texture but also balances the meatiness with a tangy crunch.
Salads: Adding sliced tri-tip to a salad transforms it into a hearty meal, particularly when combined with fresh ingredients like avocado and cherry tomatoes. A zesty vinaigrette can elevate the flavors, making the dish refreshing yet filling.
Tacos: Shredded tri-tip works wonderfully as a taco filling, especially when garnished with cilantro, onions, and lime juice. This simple preparation allows the meat’s smoky flavors to shine while providing a vibrant, fresh taste from the toppings.
Stews or Soups: Incorporating tri-tip into a stew or soup not only adds depth to the dish but also allows the meat to infuse its savory flavors into the broth. This method is perfect for creating a comforting meal, especially during colder months.
Related Post: