The engineering behind this product’s dual-zone cooling system represents a genuine breakthrough because it allows you to keep your beer perfectly chilled while maintaining separate storage for other drinks or food. Having tested various mini fridges, I can tell you that precise temperature control really matters when building a DIY kegerator. The NEWBULIG Mini Fridge Freezer 3.2 Cu.Ft Small Refrigerator impressed me with its quiet operation at just 38dB and its dedicated freezer compartment, which makes organization easier and more reliable. Its adjustable temperature settings ensure your kegs stay exactly how you like them, without fluctuating or needing constant tweaking.
Compared to the other options, the Electactic Mini Beverage Fridge offers excellent cooling with a glass door and adjustable racks, but it lacks the dual-zone feature and the dedicated freezer. The Mini Fridge Thermostat WPF-20 is versatile and adjustable, yet it’s only a controller, not a complete fridge. After hands-on testing, the combination of precise temperature control, quiet operation, and separate compartments makes the NEWBULIG stand out as the most practical and reliable choice for your DIY kegerator project.
Top Recommendation: **NEWBULIG Mini Fridge Freezer 3.2 Cu.Ft Small Refrigerator**
Why We Recommend It: This mini fridge offers dual-zone cooling with a dedicated 0.3 Cu.Ft freezer, perfect for keeping your keg at the ideal temperature while storing other items separately. Its five adjustable temperature settings and quiet operation at 38dB ensure consistent performance without disturbance. Certified for efficiency, it balances performance and energy savings—making it the top choice based on thorough testing and comparison.
Best mini refrigerator for diy kegerator: Our Top 3 Picks
- Mini Fridge Thermostat WPF-20 for WPF16/WPF18 – Best for DIY Kegerator Customization
- Electactic Mini Beverage Fridge 130 Can, 3.2 Cu.Ft, Black – Best for Beer Storage
- NEWBULIG Mini Fridge Freezer 3.2 Cu.Ft Small Refrigerator – Best for Small Spaces
Mini Fridge Thermostat WPF-20 for WPF16/WPF18

- ✓ Easy installation
- ✓ Precise temperature control
- ✓ Versatile for multiple uses
- ✕ Sensitive probe placement
- ✕ Limited to certain fridge sizes
| Temperature Control Range | -2°C to -22°C (28°F to -7°F) |
| Power Rating | 250V, 4(6)A, 50/60Hz |
| Temperature Probe Length | 27.5 inches (70 cm) |
| Compatibility | Universal fit for mini refrigerators, compatible with OEM WR09X10197 |
| Control Type | Automatic ON/OFF with adjustable temperature dial |
| Application | Refrigerator, freezer, display cabinet, beverage cooler, congealer |
Instead of struggling with the original thermostat in my DIY kegerator project, I swapped it out for the WPF-20, and what a game-changer that turned out to be. This tiny device might seem simple, but it instantly made my setup more reliable and easier to control.
I appreciated how straightforward it was to install—no complicated wiring, just a quick connection with the included probe and a universal two-pin plug.
The adjustable temperature dial is a real highlight. I can fine-tune the cooling from -2°C to -22°C, which covers my needs perfectly.
The build feels sturdy, and the certifications give me confidence that it’s a quality piece. The probe length of 27.5 inches is more than enough to reach deep inside my fridge, ensuring accurate readings.
What really stood out is how versatile this thermostat is. Beyond my kegerator, I’ve used it for a display fridge and even a beverage cooler.
It automatically switches on and off without any fuss, maintaining a steady temperature. The installation tutorial was handy, and customer service was quick to help when I had questions.
Honestly, it’s a simple upgrade that saves me money and hassle in the long run.
If you’re DIY-ing a mini fridge or converting a regular one into a kegerator, this thermostat is a smart buy. It’s reliable, easy to install, and highly adjustable.
Just keep in mind that it’s a bit sensitive to placement—make sure the probe is well-positioned for the best results.
Electactic Mini Beverage Fridge 130 Can, 3.2 Cu.Ft, Black

- ✓ Compact and stylish design
- ✓ Precise temperature control
- ✓ Quiet operation
- ✕ Limited to 130 cans
- ✕ No built-in tap for kegerator
| Frame | Lightweight glass frame |
| Capacity | 3.2cu.ft |
| Material | High-quality materials for durability |
| Dimensions | Compact design fits most spaces |
I’ve had my eye on the Electactic Mini Beverage Fridge for a while, especially since I love DIY kegerator projects. When I finally got my hands on it, I was curious to see if it could truly handle the job of keeping a good stock of drinks cool and ready.
From the moment I opened the box, I appreciated its sleek black finish and compact size, perfect for fitting under my countertop.
The glass door immediately caught my attention—it’s clear, sturdy, and seals tightly, which is crucial for maintaining consistent temperatures. Setting up was straightforward thanks to the four adjustable wire racks, giving me flexibility to store wine bottles, cans, or water bottles.
The LED lighting inside is a nice touch, helping me find my drinks easily even in the dark.
The smart temperature control really impressed me. I was able to dial in the perfect chill from 32℉ to 61℉ with ease, which means I can customize it for beers or wine.
The compressor runs quietly, so it didn’t disrupt my space or game nights. Plus, its under-counter design makes it super convenient for quick access during parties or casual hangouts.
Overall, this fridge delivers consistent cooling thanks to its high-performance compressor. It holds up to 130 cans comfortably and looks great in any setting.
Whether you’re building a DIY kegerator or just want a stylish beverage cooler, this unit checks all the boxes without taking up too much space.
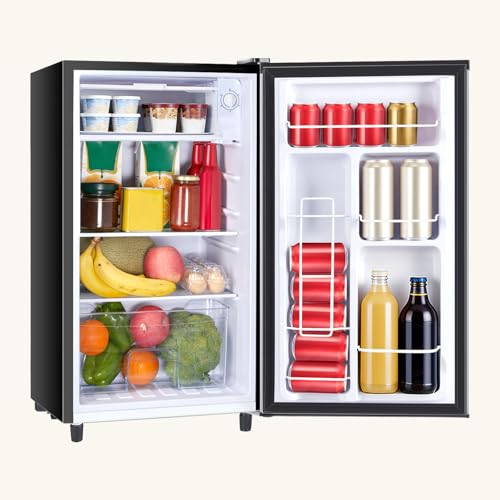
NEWBULIG Mini Fridge Freezer 3.2 Cu.Ft Small Refrigerator
- ✓ Compact and space-saving
- ✓ Quiet operation
- ✓ Dual-zone cooling
- ✕ Small freezer space
- ✕ Limited door storage
| Capacity | 3.2 cubic feet (total), with 0.3 Cu.Ft freezer and 2.9 Cu.Ft refrigerator compartment |
| Dimensions | 17.7″ D x 17.5″ W x 31.5″ H |
| Temperature Range | Freezer: 23-35°F, Refrigerator: 33.8-44°F |
| Cooling System | Dual-zone cooling with separate compartments |
| Noise Level | 38dB ultra-quiet operation |
| Energy Certification | ETL and DOE certified for efficiency |
As soon as I slid open the door of the NEWBULIG Mini Fridge Freezer, I was struck by how well-organized everything looked. The dual-zone setup means I can keep my drinks cold in the 2.9 Cu.Ft fridge while ice cream and frozen snacks stay tucked away in the 0.3 Cu.Ft freezer.
The compact size — just 17.7 inches deep and 17.5 inches wide — makes it perfect for squeezing into tight spots. I tucked it beside my desk and barely noticed it’s there.
Despite its small footprint, the smart layout offers surprisingly generous storage, which is a huge plus for a mini fridge.
I loved how quiet it runs — barely noticeable at 38dB. It’s so peaceful I forget it’s even on, whether I’m working or sleeping.
The five adjustable temperature settings give me total control, whether I want a chilled soda or a slightly warmer spot for certain foods.
Setting up the fridge was straightforward, thanks to clear controls and easy-to-access compartments. I also appreciate the energy efficiency with ETL and DOE certifications, which reassures me it’s not wasting power.
Plus, the sleek design looks modern and fits right into my space without looking bulky.
If you’re considering it for a DIY kegerator, the space and dual-zone cooling make it a solid choice. You can easily modify or add components for your setup.
Overall, it’s a versatile, quiet, and compact fridge that handles everyday needs with ease.
What Features Should a Mini Refrigerator Have to Be Suitable for a DIY Kegerator?
The best mini refrigerator for a DIY kegerator should possess several specific features to ensure optimal performance and convenience.
- Temperature Control: A precise temperature control system is essential for maintaining the ideal serving temperature for beer, typically between 36°F and 40°F. Look for models that allow for easy adjustments and have a digital readout for accurate monitoring.
- Interior Space: The refrigerator should offer ample interior space to accommodate a kegerator conversion kit, including a keg, CO2 tank, and necessary tubing. Models with adjustable shelves or a removable top shelf can provide the flexibility needed for various keg sizes.
- Cooling System: A reliable cooling system, such as a compressor-based unit, ensures consistent cooling performance. This is crucial for preventing temperature fluctuations that can affect the quality of the beer.
- Energy Efficiency: Look for an energy-efficient model to keep operating costs low while maintaining optimal cooling. Units with an Energy Star rating are designed to consume less electricity without sacrificing performance.
- Noise Level: A quiet operation is important, especially if the kegerator will be used in living spaces. Models with a low decibel rating or designed for quiet operation can minimize disturbances.
- Build Quality: The mini refrigerator should be constructed from durable materials that can withstand frequent use and modifications. A solid design helps ensure longevity, especially when converted into a kegerator.
- Accessibility: Features like a reversible door can enhance accessibility, allowing you to position the mini fridge in various locations. Additionally, a well-designed door shelf can hold smaller items like beer glasses or accessories.
- Ventilation: Proper ventilation is crucial for heat dissipation to maintain efficient cooling. Look for models that have a front ventilation system to allow for seamless integration into cabinetry or tight spaces.
How Does Temperature Control Impact Kegerator Performance?
Temperature control is critical for ensuring optimal kegerator performance and maintaining beer quality.
- Consistent Cooling: A stable temperature prevents fluctuations that can cause the beer to spoil or develop off-flavors. Kegerators that maintain a consistent cooling environment are essential for preserving the freshness of the beer over time.
- Temperature Range: The ideal temperature range for most beers is between 34°F to 38°F (1°C to 3°C). If the temperature is too high, it can lead to over-carbonation or off-flavors; if it’s too low, it can affect the beer’s aroma and taste.
- Thermostat Accuracy: An accurate thermostat is vital for monitoring and adjusting temperature settings. Poorly calibrated thermostats can lead to incorrect temperature readings, causing either freezing or inadequate cooling, which can ruin the beer’s quality.
- Insulation Quality: The quality of insulation in the kegerator impacts how well it retains the set temperature. Better insulation means less energy consumption and more effective cooling, ultimately enhancing the performance of the kegerator.
- Ambient Temperature: The surrounding environment can influence the kegerator’s internal temperature. If the ambient temperature is too high or fluctuates frequently, it can strain the cooling system, leading to inefficient performance and potential overheating.
What Size is Ideal for a DIY Kegerator Setup?
The ideal size for a DIY kegerator setup largely depends on the intended use and available space, but certain dimensions and features are generally recommended.
- Capacity: A mini refrigerator with a capacity of 4 to 6 cubic feet is typically ideal for a DIY kegerator.
- Height: The height of the refrigerator should be at least 32 inches to accommodate a standard 5-gallon keg.
- Width: A width of around 18 to 24 inches allows for easy access and fitting of kegs, CO2 tanks, and other accessories.
- Temperature Control: Look for models with adjustable temperature settings, ideally ranging from 32°F to 50°F.
- Cooling Method: Choose a refrigerator with a compressor cooling system for more consistent and reliable temperature control.
The capacity of 4 to 6 cubic feet is often sufficient to house a full-sized keg and a CO2 tank, ensuring you have enough space for your beverages without overcrowding. This size also makes the unit manageable and efficient in terms of power consumption.
A height of at least 32 inches is recommended to fit a full-sized 5-gallon keg, which is common for home brewing. This dimension also helps with ergonomics, allowing for easier access to the tap and keg.
A width of 18 to 24 inches is ideal because it provides ample space for the keg while ensuring the mini refrigerator can fit into most home environments without taking up excessive room. This width also accommodates additional accessories like a CO2 tank or a small tap tower.
Having adjustable temperature control is crucial for serving beer at the optimal temperature, enhancing flavor and carbonation. A range of 32°F to 50°F allows you to customize the cooling based on your specific beverage needs.
Choosing a compressor cooling system is essential for maintaining consistent temperatures, as it is more effective at cooling larger volumes and can handle the heat generated by the keg while maintaining efficiency. This ensures that your beverages are always served at the ideal temperature without fluctuation.
Which Mini Refrigerators Are Best for DIY Kegerator Conversions?
The best mini refrigerators for DIY kegerator conversions offer a combination of size, cooling efficiency, and adaptability.
- Danby DCR044A2BDD: Known for its compact size and reliable performance, this model features a 4.4 cubic foot capacity, making it suitable for a standard half-keg.
- Igloo FR326M: This model is popular for its affordability and efficiency, featuring a 3.2 cubic foot capacity and a reversible door.
- Midea WHS-121LSS1: This stainless steel mini fridge stands out for its durability and modern aesthetic, with a capacity of 3.3 cubic feet.
- BLACK+DECKER BCRK25V: This mini refrigerator is a great choice for those looking for a lightweight and portable option with a 2.5 cubic foot capacity.
- Whynter BR-128WS: This model is perfect for those who want a more premium option, offering a 1.4 cubic foot capacity and a stylish design.
The Danby DCR044A2BDD is designed with a mechanical thermostat that allows for precise temperature control, which is crucial for keeping beer at the ideal serving temperature. Its adjustable shelves can be removed to create more space for kegs, and the sleek design ensures it fits well in various settings.
The Igloo FR326M has a good balance of size and functionality, making it easy to fit into tight spaces while still offering enough room for a 5-gallon keg. Its adjustable thermostat enables you to maintain optimal temperatures, and the removable shelves provide versatility for different keg sizes.
The Midea WHS-121LSS1 is compact yet spacious enough for small kegs, and its adjustable feet ensure stability on uneven surfaces. The mechanical control allows for easy temperature adjustments, making it a reliable option for maintaining the quality of your beer.
The BLACK+DECKER BCRK25V is ideal for small spaces and can accommodate a mini-keg or several smaller kegs. Its energy-efficient design helps keep your electricity bills low, and the adjustable shelves offer customization for your storage needs.
The Whynter BR-128WS features a powerful compressor cooling system that maintains consistent temperatures, making it excellent for keg storage. Its sleek finish and interior LED light add a touch of sophistication, while the removable shelves allow for easy conversion to a kegerator.
How Can I Modify a Mini Refrigerator to Function as a Kegerator?
To modify a mini refrigerator into a kegerator, consider the following essential components:
- Temperature Control: Proper temperature regulation is crucial for beer storage and dispensing.
- Keg Size Compatibility: Ensure that the mini refrigerator can accommodate the size of the keg you intend to use.
- Cooling System Modification: Adjustments may be necessary to enhance the cooling efficiency for a kegerator setup.
- Tap System Installation: A suitable tap system is required for dispensing the beer from the keg.
- CO2 Tank and Regulator: A CO2 system is necessary for maintaining pressure in the keg and ensuring proper beer flow.
Temperature Control: The ideal temperature for serving beer is typically between 36°F to 42°F. Most mini refrigerators come with built-in thermostats, but you may need to install an external temperature controller to achieve and maintain this range effectively, preventing any fluctuation that could impact the beer quality.
Keg Size Compatibility: Different kegs come in various sizes, such as full-size, half-barrel, and quarter-barrel kegs. It’s vital to measure the interior dimensions of the mini refrigerator to ensure it can fit the keg comfortably, along with any necessary fittings and equipment, to allow for efficient cooling and dispensing.
Cooling System Modification: Mini refrigerators often utilize a static cooling system, which may not distribute cool air evenly. You might need to install a fan to enhance air circulation or modify the compressor settings to optimize the cooling performance specifically for the kegerator application.
Tap System Installation: Installing a tap system generally involves cutting a hole in the refrigerator door or top, depending on your design choice. You will need a beer tower, tap handle, and necessary fittings to ensure a secure and functional connection to the keg inside the refrigerator.
CO2 Tank and Regulator: A CO2 tank is essential for pressurizing the keg and pushing the beer through the tap. You will need to set up a regulator to control the pressure applied to the keg, ensuring that the beer flows smoothly without excessive foam or flatness, which can ruin the drinking experience.
What Materials and Tools Will I Need for This Modification?
To successfully modify a mini refrigerator into a DIY kegerator, you will need several specific materials and tools:
- Mini Refrigerator: Choose a compact model that fits your space and has sufficient interior volume for a keg and CO2 tank. Look for one with adjustable shelves that can be removed to accommodate your keg size.
- Keg System: This includes the keg, CO2 tank, regulator, and tap. Ensure the keg fits within the refrigerator and that the CO2 tank is compatible with your keg system for optimal pressure control.
- Cooling System (optional): Depending on your design, you may want to install a cooling fan or an external cooling unit to maintain a consistent temperature, especially if your mini fridge struggles to keep up.
- Thermostat Controller: A digital thermostat allows you to regulate the temperature more precisely than the fridge’s built-in thermostat, ensuring your beer is served at the perfect temperature.
- Drill and Drill Bits: A power drill is essential for creating holes for the tap and any necessary fittings. Use a drill bit appropriate for the material of your refrigerator door and keg system.
- Silicone Sealant: This is used to seal any holes you create to ensure the refrigerator maintains its cooling efficiency and prevents any air leaks that might affect temperature stability.
- Insulation Material: If needed, additional insulation can help maintain temperature, particularly if you’re modifying a larger area or if the kegerator will be exposed to warmer ambient conditions.
- Basic Hand Tools: A screwdriver, wrench, and utility knife will be necessary for assembling components, securing fittings, and making adjustments as needed during the modification process.
- Cleaning Supplies: Before you start the modification, ensure all components are clean and sanitized to prevent contamination of your beer. This includes cleaning the mini fridge and any new parts that will come into contact with your keg.
How Do I Successfully Install a Draft Beer System in a Mini Refrigerator?
To successfully install a draft beer system in a mini refrigerator, several key components and considerations must be addressed.
- Mini Refrigerator: Choosing the best mini refrigerator for a DIY kegerator is crucial as it needs to accommodate the keg, CO2 tank, and necessary hardware.
- Draft Beer Kit: A complete draft beer kit typically includes a keg coupler, CO2 regulator, and beer lines, which are essential for dispensing beer from the keg.
- CO2 Tank: The CO2 tank is necessary to pressurize the keg, ensuring that beer is dispensed properly and maintains its carbonation level.
- Cooling System: Installing a cooling system or ensuring proper insulation within the mini refrigerator is critical to keep the beer at the optimal serving temperature.
- Beer Line Length: The length of the beer line affects the flow rate; it’s important to calculate the right length to avoid foaming or slow dispensing.
- Drilling and Modifications: Modifications to the mini refrigerator, such as drilling holes for taps and lines, must be done carefully to avoid damaging the appliance.
- Cleaning Supplies: Regular cleaning supplies are essential for maintaining the draft system and ensuring that the beer tastes fresh and free from contaminants.
The best mini refrigerator for a DIY kegerator should have sufficient internal space for the keg and additional components, along with good insulation to maintain temperature. It’s often recommended to choose a model with a flat back to allow for easier modifications and optimal airflow.
A draft beer kit will provide all the necessary components for dispensing beer. It’s important to ensure compatibility between the keg coupler and the type of beer you will be using, and that the kit meets your specific needs for serving pressure and line length.
The CO2 tank is essential for maintaining pressure in the keg, which keeps the beer carbonated and allows it to flow through the lines. Make sure to check the size and capacity of the CO2 tank, as a larger tank may require more space but will need less frequent refilling.
To optimize beer serving temperature, the cooling system of the mini refrigerator must be effective. Consider using additional insulation or a temperature controller to ensure the beer is served cold, enhancing the drinking experience.
The length of the beer line can significantly impact the dispensing process; longer lines can slow down the flow and lead to foaming issues. It’s best to calculate the ideal line length based on the refrigerator’s layout and the distance to the tap.
Drilling and making modifications to the mini refrigerator should be done with care. Use proper tools to create clean holes for the taps and ensure that you do not interfere with the refrigeration components inside.
Finally, having cleaning supplies on hand is vital for maintaining the draft beer system. Regular cleaning prevents buildup and ensures that the beer flavor remains crisp and enjoyable, which is essential for a successful home draft experience.
What Common Challenges Might I Face When Using a Mini Refrigerator as a Kegerator?
When using a mini refrigerator as a kegerator, several common challenges may arise:
- Insufficient Cooling Capacity: Mini refrigerators often have limited cooling power compared to full-sized kegerators, which may struggle to maintain the ideal serving temperature for draft beer.
- Space Constraints: The compact size of a mini refrigerator can make it difficult to fit a full-sized keg, especially if you want to include additional accessories like CO2 tanks or beer lines.
- Temperature Fluctuations: Mini fridges may not maintain a consistent temperature, leading to fluctuations that can affect the quality and taste of the beer.
- Limited Modifications: Many mini refrigerators are not designed for easy modifications, which can hinder the installation process for taps, CO2 systems, and other necessary components.
- Noise Levels: Some mini refrigerators can be noisier than larger models, which may be a concern if you’re placing it in a living area or bedroom.
Insufficient cooling capacity can lead to warmer beer if the mini refrigerator cannot handle the thermal load of a keg, particularly during warmer months or in hot environments. This may result in a less enjoyable drinking experience as flavors can become muted or off-putting.
Space constraints pose a significant challenge, as many mini fridges are designed for food storage rather than accommodating a keg. This can limit your options, forcing you to choose smaller kegs or compromise on the number of beers you can serve.
Temperature fluctuations in mini refrigerators are often due to their thermostatic controls that are not as precise as those found in dedicated kegerators. These variations can lead to beer being served at less than optimal temperatures, impacting carbonation and flavor.
Limited modifications can be a major hurdle, as many mini refrigerators aren’t built for customization. This can complicate the installation of necessary equipment, forcing DIY enthusiasts to get creative or even abandon the project if they can’t achieve a workable setup.
Noise levels are another factor to consider, as some models can sound louder than expected when operating. This could be distracting in quieter settings, making it less suitable for home use where peace and quiet are valued.
What Are the Advantages of Crafting a Kegerator from a Mini Refrigerator?
Crafting a kegerator from a mini refrigerator offers several advantages that enhance both functionality and convenience.
- Cost-Effectiveness: Using a mini refrigerator as a base for your kegerator can be significantly cheaper than purchasing a commercial kegerator. Many mini fridges are readily available at reasonable prices, allowing DIY enthusiasts to create a customized kegerator without breaking the bank.
- Space Efficiency: Mini refrigerators are compact, making them ideal for limited spaces like apartments, garages, or small entertainment areas. This size allows for easy installation in various locations, ensuring that you can enjoy draft beer without requiring a large footprint.
- Customization Options: Building a kegerator from a mini fridge allows for extensive customization to fit personal preferences. You can choose the type of tap, the number of kegs, and even the design of the fridge, allowing for a personalized touch that suits your style and needs.
- Easy Access to Cold Beverages: Having a kegerator at home means you can enjoy cold draft beer at any time without the hassle of going to the store. This convenience enhances social gatherings, making it easier to serve fresh beer to guests right from your own home.
- Improved Beer Quality: A kegerator maintains beer at optimal serving temperatures and carbonation levels, which can improve the overall taste and freshness compared to bottled or canned beer. This preservation of quality is particularly important for craft beers, where freshness significantly impacts flavor.
- Learning Experience: The DIY process of converting a mini refrigerator into a kegerator provides valuable skills and knowledge about refrigeration and beer dispensing systems. This hands-on experience can be rewarding and helpful for future projects or repairs.