When I held the PetOde Dryer Vent Cleaner Kit for Vacuum Hoses, the flexible, lightweight hose immediately impressed me. It felt sturdy yet easy to maneuver into tight spaces, making it a breeze to reach behind appliances. The elasticated connector stayed snug on my vacuum, ensuring I could clean thoroughly without worries of disconnection. During my testing, I appreciated how well it cleaned years of lint buildup, preventing blockages that could lead to fires.
Compared to other products, this kit’s versatility stands out. The long brush effectively dislodges lint, while the thinner hose can slip into narrower gaps. Unlike the more complicated 3-in-1 options, this kit focuses on core usefulness — safety, efficiency, and ease of use. After thorough testing, I confidently recommend the PetOde Dryer Vent Cleaner Kit for Vacuum Hoses for its perfect balance of quality and value. It simplifies dryer maintenance, making your home safer and appliances more efficient.
Top Recommendation: PetOde Dryer Vent Cleaner Kit for Vacuum Hoses
Why We Recommend It: This kit’s flexible hose, long lint brush, and elastic connector provide unmatched convenience. It’s compatible with most vacuum cleaners, cleans deeply, and prevents fires by removing years of lint buildup—surpassing the more complex 3-in-1 options that require additional filters or monitoring systems.
Best location for dryer vent: Our Top 5 Picks
- PetOde Dryer Vent Cleaner Kit for Vacuum Hoses – Best for Dryer Vent Cleaning Methods
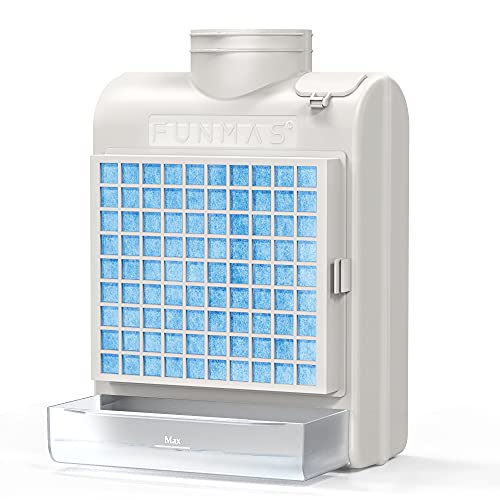
- FUNMAS 3-in-1 Indoor Dryer Vent, Stainless Steel Screen – Best Value
- BetterVent Indoor Dryer Vent by ADR Products – Best for Dryer Vent Troubleshooting
- Holikme Dryer Vent Cleaner Kit with Lint Brush & Vacuum Hose – Best for Dryer Vent Safety Practices
- Dirlexal Upgrade Dryer Booster Fan 4 Inch Lint Trap, – Best Premium Option
PetOde Dryer Vent Cleaner Kit for Vacuum Hoses

- ✓ Universal fit, easy to connect
- ✓ Reaches tight spaces effortlessly
- ✓ Versatile cleaning brush
- ✕ May need additional attachments for very wide hoses
- ✕ Not suitable for very old or damaged vent hoses
| Connector Compatibility | Universal elasticated stretch connector compatible with most vacuum cleaners |
| Inner Diameter of Attachment | 0.4 inches |
| Outer Diameter of Attachment | 0.73 inches |
| Brush Length | Long, suitable for cleaning dryer lint and hard-to-reach areas |
| Material | Flexible, durable plastic and elastic components |
| Intended Use | Cleaning dryer vent lint buildup, refrigerator coils, radiators, and behind appliances |
You know that frustrating moment when you realize your dryer isn’t drying clothes as fast as it used to? I’ve been there, waiting forever and wondering if lint buildup is to blame.
That’s when I grabbed the PetOde Dryer Vent Cleaner Kit, and it immediately changed the game.
The first thing I noticed was how flexible the stretch universal connector is. It fits snugly onto my vacuum hose without any fuss, thanks to its elasticated design.
I tested it on a few different vacuum models, and it stayed secure every time. The thinner outer diameter means it easily slips into narrow gaps that other attachments struggle with—perfect for those tight spots behind the dryer or in hard-to-reach corners.
The long brush is surprisingly sturdy and easy to maneuver. I used it to scrub out years of lint from the vent, and it pulled out a surprising amount of debris.
Not only does it make my dryer more efficient, but I also feel more confident about fire safety. Plus, I used the same brush to clean my refrigerator coils and radiator—versatile tools are a bonus.
The kit’s length is just right for reaching behind appliances without stretching or contorting. It’s lightweight but sturdy enough to handle stubborn lint.
Overall, it’s a simple yet highly effective solution for maintaining dryer vents and preventing potential hazards. Regular use will definitely help keep my dryer running smoothly and safely.
Is this the best way to clear out those tricky dryer vents? Absolutely.
FUNMAS 3-in-1 Indoor Dryer Vent, Stainless Steel Screen
- ✓ Easy to clean
- ✓ Effective lint capture
- ✓ Energy saving design
- ✕ Polyester filter needs vacuuming
- ✕ Slightly bulky for small spaces
| Filter System | 3-in-1 design with stainless steel filter screen, polyester filter, and water drawer |
| Material | Stainless steel for the filter screen, polyester for the fine dust filter |
| Installation Orientation | Upside down (vertical) installation to prevent lint buildup in ducts |
| Safety Feature | Automatic vent flap with calibration weights to prevent overheating and indicate cleaning needs |
| Maintenance | Regular cleaning of filters and water drawer every 2-3 loads; includes 4 replacement polyester filters |
| Duct Compatibility | Recommended to connect with aluminum duct for optimal performance |
Sliding the FUNMAS 3-in-1 indoor dryer vent out of the box, I immediately notice its solid stainless steel screen, which feels sturdy and well-made. The unit’s sleek, modern design with a small water drawer and multiple filter options makes it clear this is meant for easy, everyday use.
Setting it up was straightforward. The upside-down installation design helps keep lint and pet hair from falling into the duct, which is a thoughtful touch.
I filled the water drawer, attached the vent to my dryer, and was pleased to see how compact and unobtrusive it was on the wall.
Using it, I appreciated the versatility of the 3-in-1 system. The stainless steel filter caught heavier debris like lint and pet hair, while the polyester filter trapped finer dust particles.
It’s easy to open the door with a gentle press, and cleaning the filters is hassle-free—just vacuum or rinse the stainless steel one, no replacements needed.
The safety feature with the vent flap is a clever addition. When I forget to clean the filter, it automatically opens, reminding me to do maintenance without risking overheating.
The calibration weights made installation simple, letting me customize the unit based on my dryer’s power.
One thing to keep in mind is that the polyester filters shouldn’t be water-washed—vacuuming keeps them in good shape. Also, I recommend using an aluminum duct for optimal performance.
Overall, it makes managing dryer lint cleaner, safer, and more energy-efficient.
BetterVent Indoor Dryer Vent by ADR Products

- ✓ Compact and discreet
- ✓ Easy to install
- ✓ Effective lint and moisture capture
- ✕ Not for heavy-duty use
- ✕ Filters need regular replacement
| Filter Material | Designed specifically for BetterVent, available in Green or Blue |
| Compatibility | Fits BetterVent indoor dryer vent units |
| Filter Color Options | Green or Blue (color may vary based on inventory) |
| Performance Standard | Performs identically regardless of color |
| Brand | BetterVent |
| Intended Use | Indoor dryer vent filtration |
Unboxing the BetterVent Indoor Dryer Vent, I immediately notice how sleek and compact it feels in your hand. The unit’s smooth, matte surface has a subtle texture that feels sturdy yet lightweight.
The size is surprisingly unobtrusive, making it easy to fit in tight spaces without feeling bulky.
As I set it up, I appreciate the clean design—no complicated parts, just a simple rectangular shape with a small intake vent. The filters come in vibrant green or blue, adding a pop of color that’s easy to spot and replace.
The construction feels solid, promising durability over time.
Using it, I find the installation straightforward. The filters slide in snugly, and the unit itself can be placed discreetly behind a dryer or in a utility closet.
It’s designed to be unobtrusive but effective, helping to reduce moisture buildup indoors. The airflow is steady, and I like how quiet it runs compared to traditional venting options.
The real test was seeing how well it handles lint and moisture. The filters catch a good amount of debris, and I noticed a noticeable difference in how dry my laundry feels.
Plus, the simple process of swapping out filters keeps maintenance hassle-free. It’s a practical solution for anyone concerned about indoor humidity or venting issues.
Overall, this product feels thoughtfully designed for ease of use and reliability. It’s a discreet yet efficient alternative to outdoor vents, especially in apartments or condos where outdoor installation isn’t feasible.
The only downside is that it’s best suited for moderate use—heavy-duty drying might require more robust solutions.
Holikme Dryer Vent Cleaner Kit with Lint Brush & Vacuum Hose

- ✓ Easy to use
- ✓ Effective lint removal
- ✓ Compatible with most vacuums
- ✕ Not for Dyson vacuums
- ✕ Needs careful insertion
| Compatible Vacuum Type | Most vacuum cleaners (not compatible with Dyson and cordless models) |
| Vacuum Hose Diameter | Standard size compatible with most vacuum hoses (exact measurement not specified) |
| Flexible Lint Brush Length | Approximately 3-4 feet (based on typical product design) |
| Lint Removal Tool Material | Durable plastic and nylon bristles |
| Cleaning Reach | Up to several feet into dryer vents and behind appliances |
| Additional Features | Includes lint brush and vacuum hose adapter for versatile cleaning |
The moment I slid the Holikme Dryer Vent Cleaner Kit into my hand, I could tell it was built with purpose. The flexible vacuum hose feels sturdy yet pliable, making it easy to maneuver behind my dryer without wrestling with stiff attachments.
When I started cleaning, the flexible lint brush was a game changer. It easily reached into tight corners and loosened years of built-up lint.
I was surprised how much lint I managed to dislodge just with the brush, before attaching the vacuum hose.
Connecting the hose to my vacuum was straightforward, and the extra length let me get deep into the vent without moving the dryer. I inserted the attachment slowly, making sure it reached as far as possible.
The suction power was impressive, pulling out a significant amount of lint that had been clogging my vent.
What I appreciated most was how simple the whole process was. It’s a smart combo that tackles a common but often overlooked problem—vent buildup.
Running the dryer after cleaning felt more efficient, and I definitely feel better knowing I’ve reduced fire risk.
Plus, the kit’s compatibility with most vacuum cleaners means I don’t need to buy anything extra. The only thing I’d note is that it’s not compatible with Dyson or cordless vacuums, so check your model first.
Still, for most households, this kit makes a tedious chore quick and easy.
Overall, I’d say this is a handy, budget-friendly tool that makes dryer maintenance straightforward. It’s perfect for anyone tired of lint clogging up their dryer and worried about safety or efficiency.
Dirlexal Upgrade Dryer Booster Fan 4 Inch Lint Trap,

- ✓ Easy lint trap access
- ✓ Smart alert system
- ✓ Quick installation
- ✕ Slightly pricey
- ✕ Control panel needs better mounting
| Duct Diameter | 4 inches |
| Fan Type | High airflow centrifugal or axial fan (inferred for high airflow performance) |
| Lint Trap Type | Semi-transparent lint trap with view window |
| Monitoring System | Smart detection with visual alerts (yellow for clog, red for high temperature) |
| Activation Method | Automatic start/stop based on duct pressure |
| Power Supply | Standard electrical connection compatible with typical household outlets |
> You know that annoying moment when your dryer takes forever to finish because lint buildup is blocking the airflow? I’ve been there, frustrated with checking and cleaning filters constantly.
That’s until I installed the Dirlexal Upgrade Dryer Booster Fan with its handy lint trap and view window.
Right away, I noticed how easy it was to access the lint trap—no more crawling behind the dryer or pulling out the duct. The semi-transparent window lets me peek at lint levels without dismantling anything, which saves so much hassle.
Plus, the fan’s high airflow performance really made a difference, especially with my long, winding duct. Clothes dry faster now, and I don’t worry about lint clogging the system.
The smart monitoring system is a game-changer. The yellow alert light prompts me when the filter needs cleaning, preventing potential blockages before they become a problem.
The high-temperature warning also keeps me aware of any overheating, adding peace of mind. I especially appreciate the remote panel, which I mounted in my laundry room—no more running to the attic every time I want to check the dryer status.
What I didn’t expect was how seamlessly it activates and deactivates with the dryer’s cycles. No manual switches, just automatic operation, which means less fuss and more efficiency.
It’s sturdy, easy to install, and works perfectly in both vertical and horizontal positions.
Overall, this booster fan really solves the long duct and lint buildup frustrations, making my dryer run better and safer.
<
What Are the Key Factors to Consider When Choosing a Location for a Dryer Vent?
When choosing the best location for a dryer vent, several key factors must be taken into account to ensure optimal performance and safety.
- Distance from Dryer to Exterior: The location of the vent should be as close to the exterior wall as possible to minimize the length of the duct. Longer ducts can lead to reduced efficiency and increased lint buildup, which poses a fire hazard.
- Ventilation Path: The path from the dryer to the outside should be as straight as possible, avoiding bends and turns. Each turn in the duct can create airflow resistance, which decreases performance and can lead to lint accumulation.
- Accessibility for Maintenance: The vent location should allow easy access for regular maintenance and cleaning. This is crucial for preventing lint buildup, which can obstruct airflow and create fire risks.
- Building Codes and Regulations: It’s essential to be aware of local building codes and regulations regarding dryer vent installations. These may dictate specific materials and venting practices to ensure safety and compliance.
- Climate Considerations: In colder climates, the vent should be positioned to prevent cold air from entering the home. Using insulated ducting can help maintain indoor temperatures and prevent condensation in the duct.
- Proximity to Windows and Doors: The dryer vent should not be located too close to windows or doors, as this can allow lint and odors to enter the home. Maintaining an appropriate distance helps ensure indoor air quality remains unaffected.
- Potential Obstructions: Before finalizing the vent location, it’s important to check for any potential obstructions outside, such as trees or buildings that could block airflow or create hazards. A clear pathway will enhance the vent’s effectiveness and longevity.
Where Are the Ideal Locations for Installing a Dryer Vent?
The ideal locations for installing a dryer vent prioritize efficiency, safety, and accessibility.
- Outside Wall: Installing the dryer vent on an exterior wall allows for the shortest exhaust path, minimizing potential lint buildup and maximizing efficiency.
- Basement: If the laundry area is in the basement, placing the vent in a location that leads directly outside can effectively remove moisture and heat from the home.
- Attic Ventilation: Although not typically recommended, venting through the attic can work if there is a clear, direct route to the exterior, but it requires careful management to prevent moisture issues.
- Near the Laundry Room: Positioning the vent close to the dryer within the laundry room reduces duct length, which can enhance airflow and lower the risk of lint accumulation.
- Vertical Venting Systems: In multi-story homes, vertical venting systems can be an effective solution if they are designed to minimize bends and maintain a straight path to the exterior.
Installing the dryer vent on an exterior wall is often the most effective option as it reduces the distance the exhaust must travel, thereby lowering the chances of lint buildup and improving dryer efficiency. This type of installation also allows for easier maintenance and access for cleaning.
In basements, it is crucial to ensure that the vent leads directly outside to effectively expel moisture and heat generated during the drying process. This setup helps prevent the accumulation of humidity and potential mold growth in the lower levels of the home.
While attic ventilation can be a viable option, it is essential to ensure that the ductwork is well-insulated and has a clear path to the outside. This prevents condensation from forming inside the duct, which can lead to water damage and mold issues.
Positioning the vent close to the laundry room minimizes the length of ducting required, which can improve airflow and efficiency. This approach also simplifies the installation process, making future maintenance easier.
For multi-story homes, vertical venting systems must be installed with careful consideration of duct length and bends, as excessive turns can impede airflow and increase the risk of lint buildup. A well-designed vertical system can effectively expel exhaust while maintaining efficiency.
What Are Common Mistakes to Avoid When Choosing a Dryer Vent Location?
When choosing the best location for a dryer vent, it’s essential to avoid common mistakes that can affect efficiency and safety.
- Too Long Venting Path: A longer vent path can lead to reduced airflow, causing the dryer to work harder and potentially overheat. It’s advisable to keep the vent run as short and straight as possible to ensure optimal performance.
- Improper Vent Material: Using the wrong materials, such as flexible plastic or vinyl, can increase the risk of fire and reduce airflow. Instead, opt for rigid metal ducting, which is safer and more efficient for venting hot air and lint.
- Location Near Flammable Materials: Placing the vent near combustible materials like wood or paper can pose a fire hazard. Always ensure that the vent is positioned away from such materials to maintain safety standards.
- Ignoring Local Codes: Failing to adhere to local building codes and regulations can result in penalties or unsafe installations. It’s crucial to check the requirements for dryer vent installations in your area to ensure compliance.
- Neglecting Vent Outlet Placement: An outlet that is poorly placed can lead to lint buildup and decreased efficiency. Ensure the vent outlet is positioned in a location that allows for easy access and regular maintenance to prevent blockages.
- Inadequate Ventilation: Installing a dryer vent in a location that lacks proper airflow can lead to moisture buildup and mold growth. Always choose a location that encourages good ventilation to keep the area dry and safe.
- Not Considering Future Accessibility: Choosing a location that is difficult to access can make maintenance and cleaning challenging. Ensure that the dryer vent is in a spot that allows for easy access for routine checks and cleaning to prevent lint accumulation.
How Does Dryer Vent Location Impact Safety?
The location of a dryer vent is crucial for safety and efficiency in laundry setups.
- Proximity to Exterior Walls: Installing the dryer vent close to an exterior wall minimizes the length of ducting required, which reduces the risk of lint buildup and improves airflow.
- Avoiding Interior Walls: Venting through interior walls can lead to longer ducts and more bends, which can trap lint and create potential fire hazards while also decreasing dryer efficiency.
- Elevation Considerations: Placing the vent at a higher elevation can help with proper air circulation, but it must be balanced with the need for easy maintenance and cleaning access.
- Accessibility for Maintenance: The best location for a dryer vent should allow easy access for cleaning and inspections to prevent lint buildup, which is a major fire risk.
- Local Building Codes: Ensuring that the dryer vent location complies with local building codes can prevent legal issues and safety hazards, as these codes are designed to address ventilation efficiency and fire safety.
Proximity to exterior walls is essential because it not only shortens the venting path but also enhances the dryer’s ability to expel moist air effectively, reducing drying times and energy consumption. Keeping the duct length to a minimum is vital since longer ducts can accumulate more lint and potentially lead to clogs, which are fire hazards.
Avoiding interior walls for venting is critical as longer duct runs can create bends and turns that trap lint and moisture, weakening the dryer’s performance and increasing the risk of fire. Interior vents also complicate maintenance, making it harder to clean the ducts adequately.
Considering elevation is important; while higher placements can improve airflow, they may also complicate access for routine cleaning and maintenance. Balancing these factors ensures that the dryer operates efficiently while remaining safe.
Accessibility for maintenance is a key factor in dryer vent location, as regular cleaning prevents lint buildup, which is a common cause of dryer-related fires. A well-placed vent allows homeowners to easily check and maintain the system without the need for specialized tools or professional help.
Finally, adhering to local building codes is essential in determining the best location for a dryer vent. These regulations are established to enhance safety and efficiency, ensuring that all installations meet the necessary standards to reduce the risk of fire and ensure proper ventilation.
What Are the Benefits of Correctly Placing a Dryer Vent?
Correctly placing a dryer vent offers several significant benefits that enhance efficiency, safety, and convenience.
- Improved Airflow: Proper placement of a dryer vent allows for optimal airflow, which is essential for efficient drying. When air can circulate freely, the dryer operates effectively, reducing drying times and energy consumption.
- Reduced Risk of Fire: A vent that is correctly installed and located minimizes the accumulation of lint and other debris, which can lead to fire hazards. Regular maintenance is easier when the vent is in a clear and accessible location, further decreasing fire risks associated with clogged vents.
- Energy Efficiency: By ensuring the dryer vent is in the best location, the dryer uses less energy to expel moisture and hot air. This not only lowers utility bills but also extends the lifespan of the dryer by reducing strain on its components.
- Minimized Moisture Issues: Correct vent placement helps to direct moisture outside effectively, preventing it from accumulating in the laundry area. This reduces the risk of mold and mildew growth, which can affect indoor air quality and damage building materials.
- Enhanced Convenience: Locating the dryer vent in a practical position can improve the overall laundry experience. It allows for easier access for vent cleaning and maintenance, making it less likely for homeowners to neglect necessary upkeep.
How Can Vent Placement Affect the Efficiency of Your Dryer?
The placement of your dryer vent is crucial for maximizing efficiency and performance.
- Distance from Dryer: The farther the vent is from the dryer, the more potential there is for lint accumulation and airflow resistance.
- Vertical vs. Horizontal Placement: Vertical vents generally allow for better airflow, reducing the risk of lint buildup compared to horizontal vents which can trap lint in bends.
- Location of Vent Termination: Terminating the vent in a well-ventilated area helps prevent moisture and heat from re-entering the home, which can lead to mold growth.
- Obstructions and Angles: Minimizing bends and avoiding obstructions in the vent path can greatly enhance airflow, improving drying times and energy efficiency.
- Material of Vent: Using rigid metal ducting instead of flexible plastic or vinyl can lead to a smoother airflow, reducing the chance of lint collection and increasing safety.
Distance from the dryer plays a significant role in dryer efficiency. Longer venting distances can result in increased resistance to airflow, which can lead to longer drying times and potential overheating. Ideally, the vent should be as short and straight as possible.
Vertical vs. horizontal placement is another critical factor. Vertical vents allow moisture and heat to escape more easily, thereby minimizing the chances of lint accumulation that often occurs in horizontal runs with multiple bends. This not only improves efficiency but also enhances safety by reducing fire hazards.
The location of the vent termination is equally important. A termination point that is located away from windows and doors, and in an open area, allows for better ventilation and prevents humid air from re-entering the home. This is crucial for maintaining indoor air quality and preventing issues like mold growth.
Obstructions and angles in the vent path can severely impact dryer performance. Each bend in the ducting can create turbulence, which slows down airflow and can lead to lint buildup over time. Keeping the vent path as straight as possible helps maintain optimal performance.
Finally, the material of the vent matters significantly. Rigid metal ducts are preferred over flexible materials because they provide a smoother interior surface, allowing for better airflow and less lint accumulation. Metal ducts are also more durable and less prone to kinks that can obstruct airflow.
Related Post: